How to use GutterFlow
Every screen you'll touch on a real job — from adding the client to getting the estimate signed. About four minutes of reading.
The Estimates screen
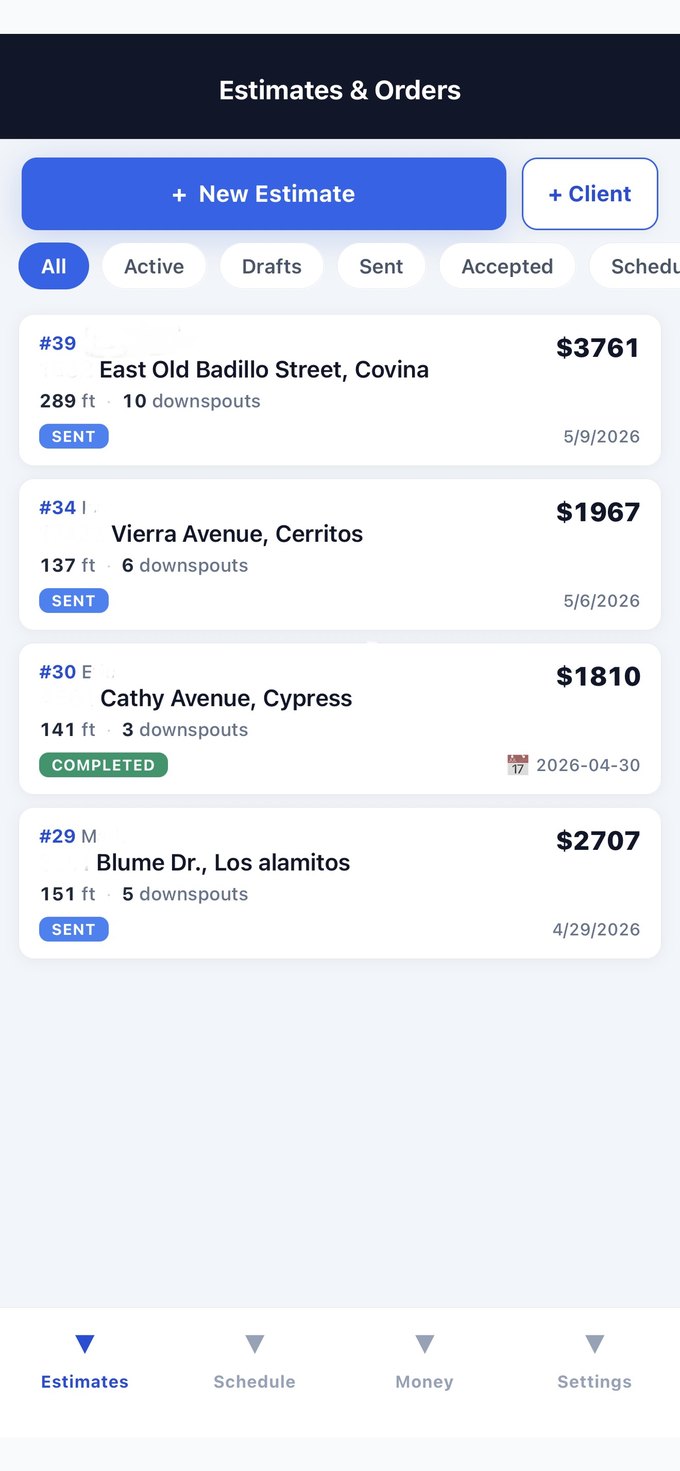
This is where every job lives. Each card shows the address, total linear feet, number of downspouts, the price and the current status.
- + New Estimate — start a job from scratch.
- + Client — save a customer now, estimate later.
- Filter chips: All · Active · Drafts · Sent · Accepted · Scheduled.
Add the client and the address
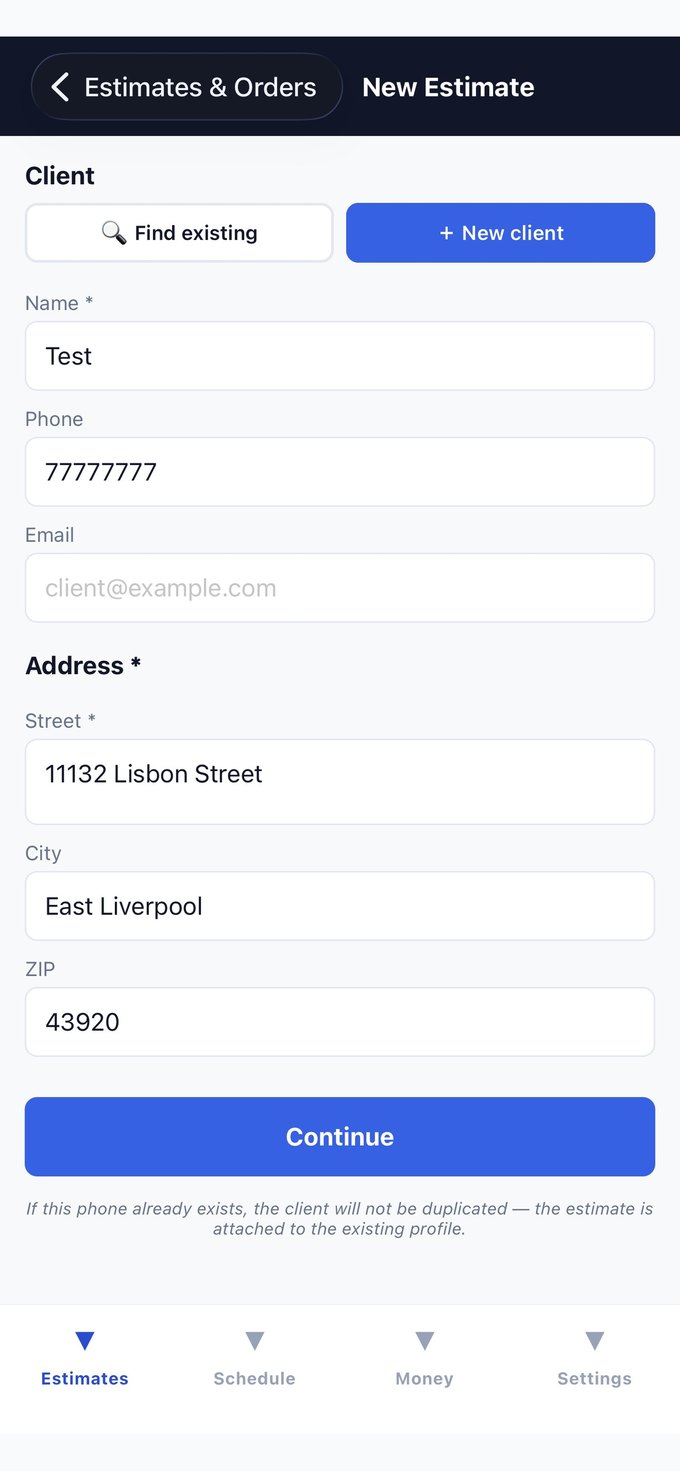
Tap + New Estimate. Either pull up an existing customer with Find existing, or fill in a new one — name, phone, email and the install address.
- Name and street address are required. Email only matters if you'll email the PDF.
- Type the phone first — if that number already exists, the app attaches the job to that client instead of creating a duplicate.
Sketch the roofline
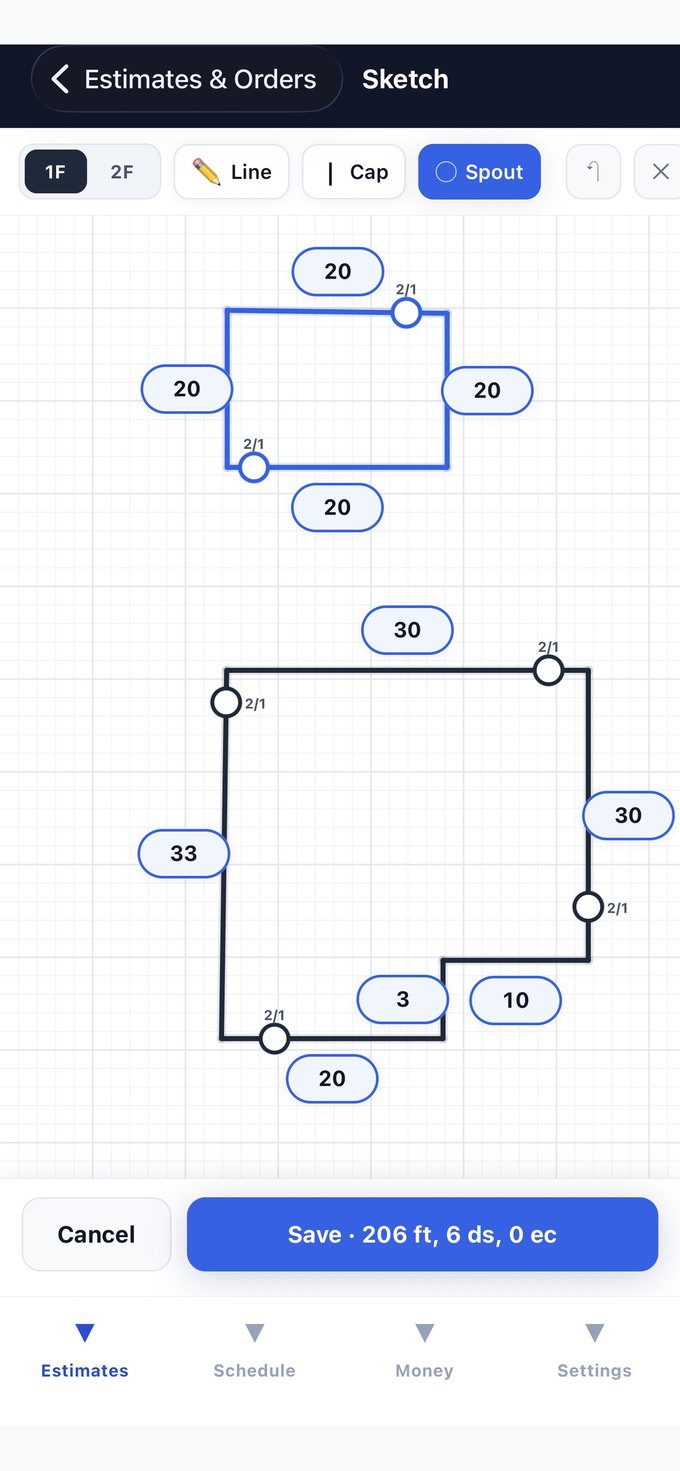
Draw the gutter run with your finger on the grid. Every segment you draw gets its length label, and the running totals sit right on the Save button.
- 1F / 2F — switch floors before drawing. Second-floor runs get the upper-floor labor rate automatically.
- Line — draw a gutter run. Tap a length label to type an exact number.
- Cap — mark an end cap. Spout — drop a downspout on the corner you tap.
- The arrow undoes the last action; the ✕ clears the canvas.
Check the estimate
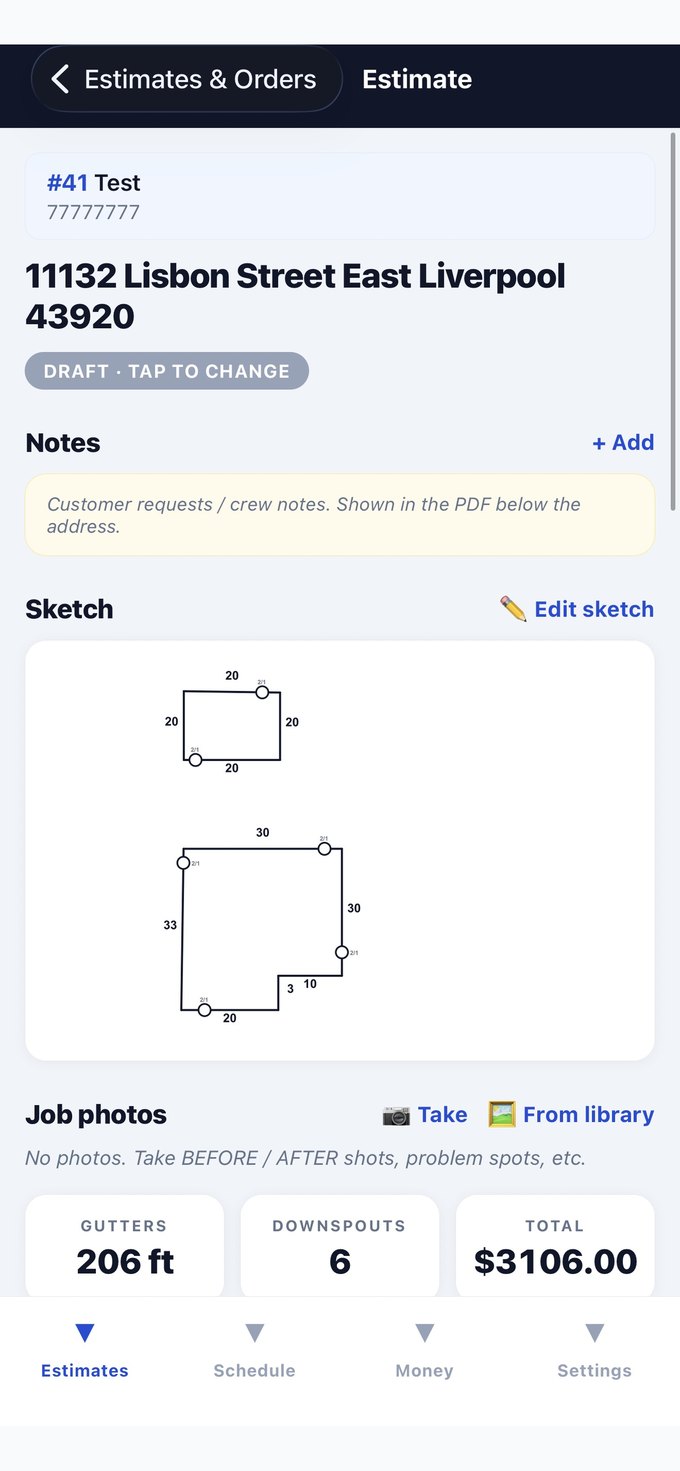
After saving the sketch you land on the estimate itself. The top of the screen carries the identity of the job and the headline numbers.
- DRAFT · TAP TO CHANGE — the status pill. Tap it to move the job along manually.
- Notes — customer requests and crew notes. These print on the PDF under the address.
- Sketch — thumbnails of each floor. Edit sketch reopens the canvas.
- Job photos — take BEFORE / AFTER shots and problem spots straight from here.
Gutter style, colors, materials
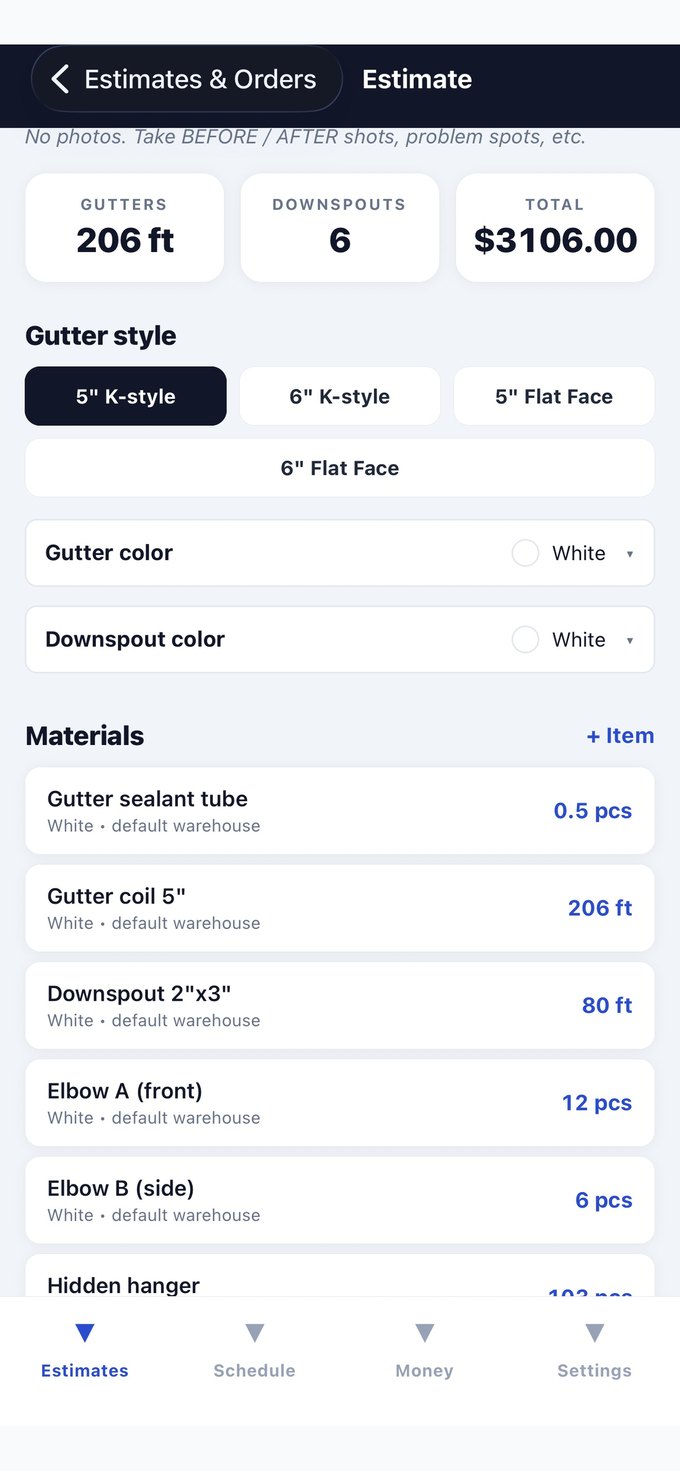
Pick the profile — 5" or 6" K-style, 5" or 6" Flat Face — then the gutter and downspout colors. The materials list underneath fills itself from your rules.
- Coil footage matches the sketch. Hangers come from your spacing rule. Sealant is per job.
- Every line shows its colour and warehouse, so the crew knows where to pull it from.
- + Item adds anything unusual — leaf guard, splash blocks, custom elbows.
Labor, totals and warranty
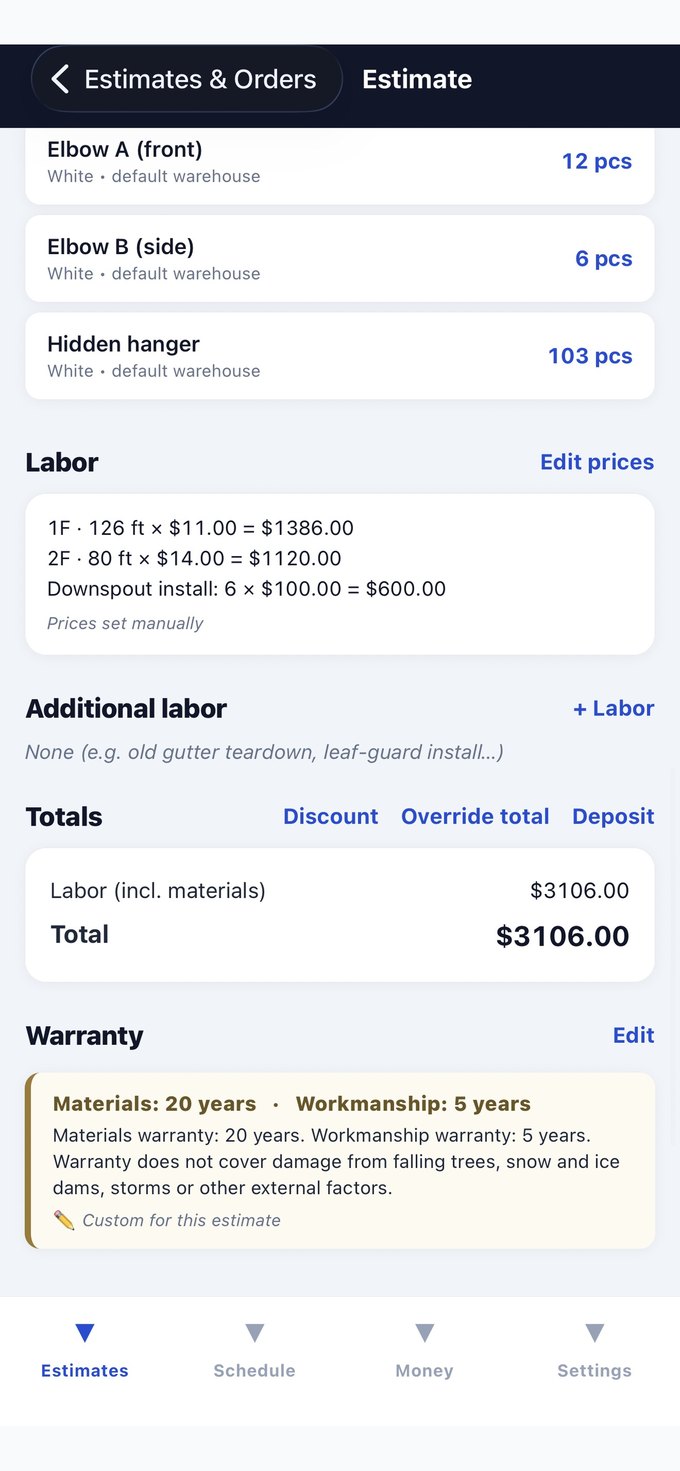
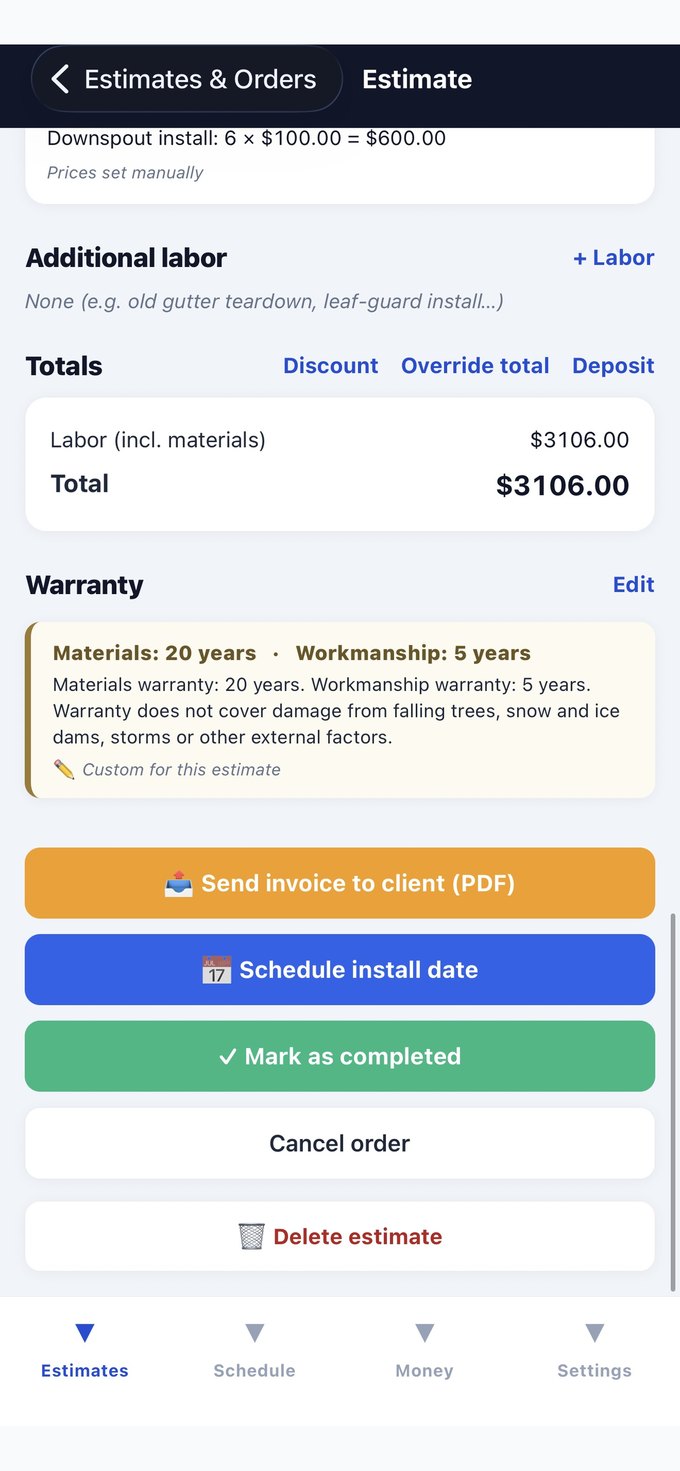
Labor is broken out so you can defend the price line by line: first-floor footage at your 1F rate, second-floor at the 2F rate, downspouts per unit.
- Edit prices overrides the rate for this job only — your defaults stay untouched.
- + Labor adds extras like old gutter teardown or leaf-guard install.
- Discount · Override total · Deposit — knock money off, force a round number, or record money taken up front.
- Warranty — your standard terms, editable per estimate. They print on the PDF.
Send it to the client
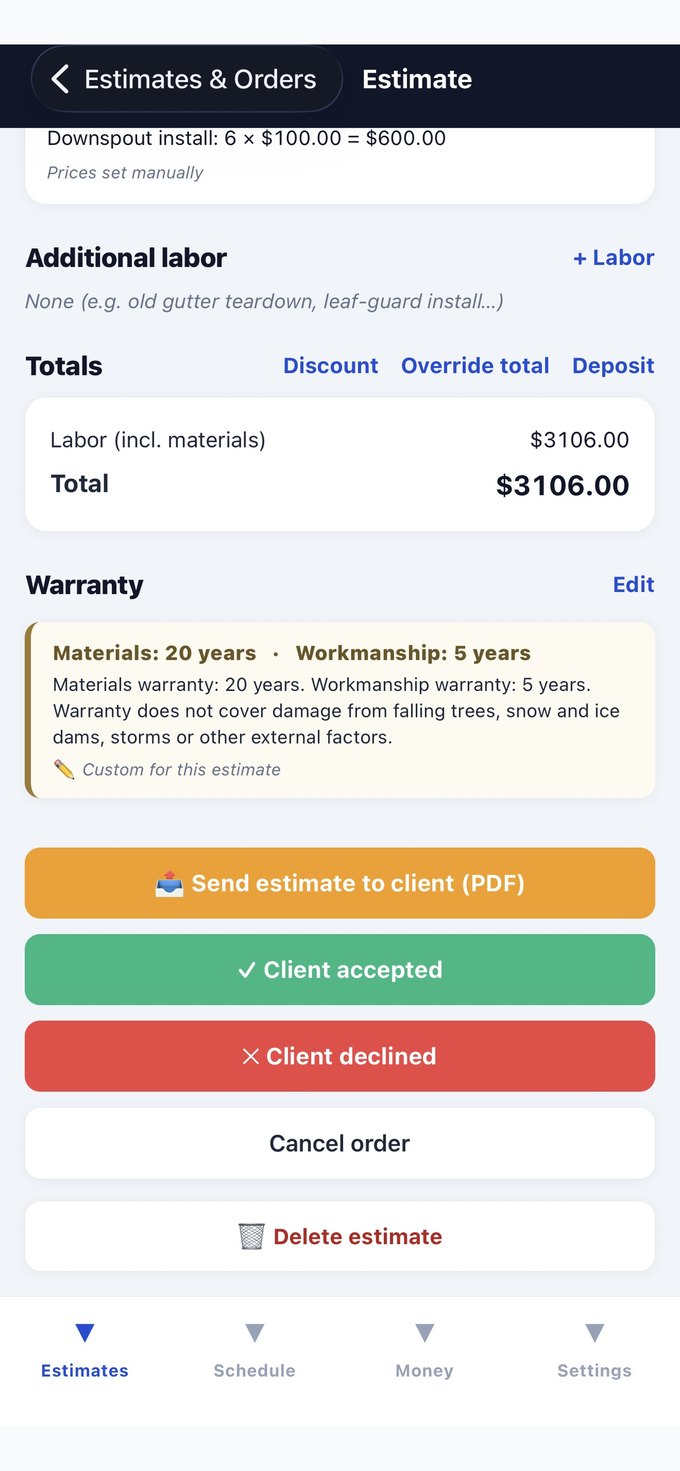
At the bottom of a draft sit the actions that move the job forward. One tap builds the PDF and opens your phone's share sheet — email, text, AirDrop, whatever the customer prefers.
- Send estimate to client (PDF) — generates the branded document and marks the job Sent.
- Client accepted / Client declined — record the answer when they call back.
- Cancel order keeps the record; Delete estimate removes it for good.
What the client actually gets
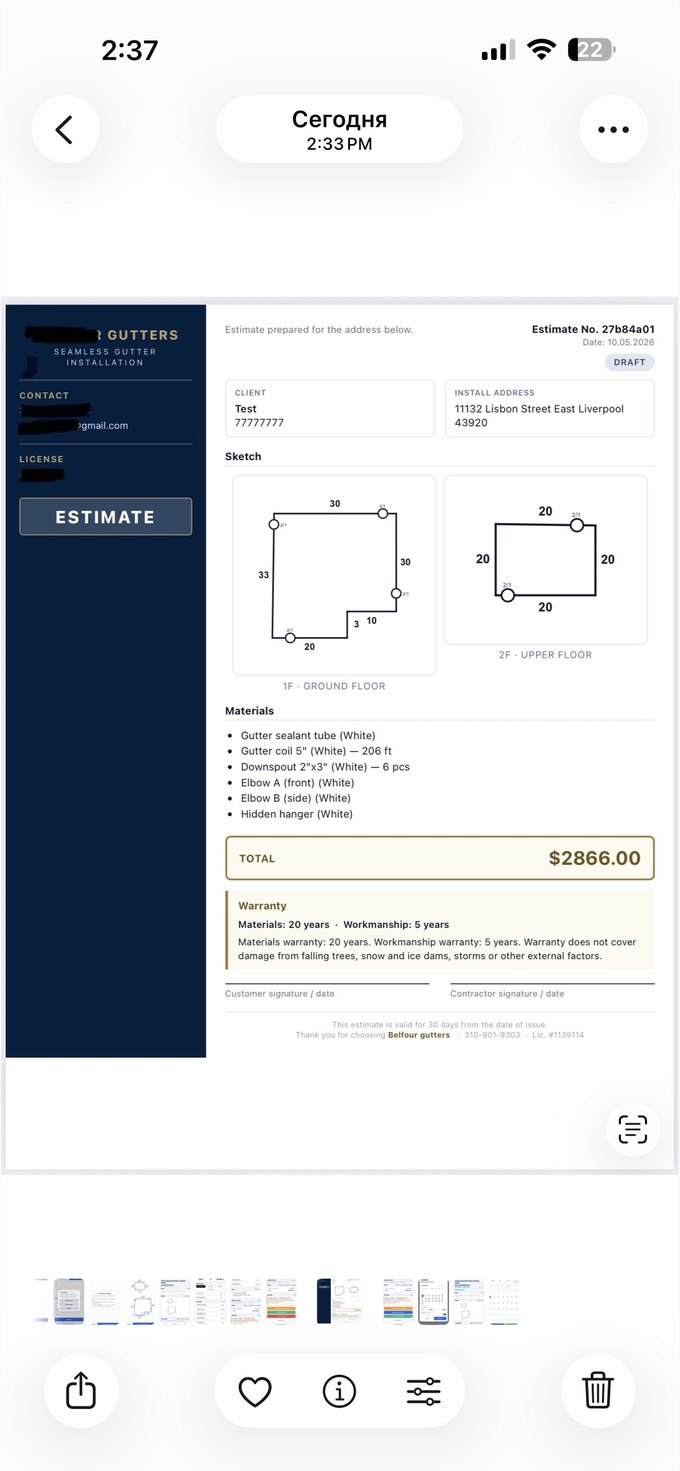
A clean one-page document with your branding on it — not a screenshot of an app.
- Your logo, license number and contact details down the side.
- Estimate number, date, client and install address up top.
- The sketch — each floor drawn separately and labelled.
- Materials list, the total, warranty terms, and signature lines for both sides.
Schedule it and finish it
Mark the estimate accepted and the buttons change — now it's a job to run, not a quote to chase.
- Send invoice to client (PDF) — same document, invoice wording.
- Schedule install date — drops the job on the calendar and notifies the assigned crew.
- Mark as completed — closes the job and moves the money into completed revenue.
Track the money
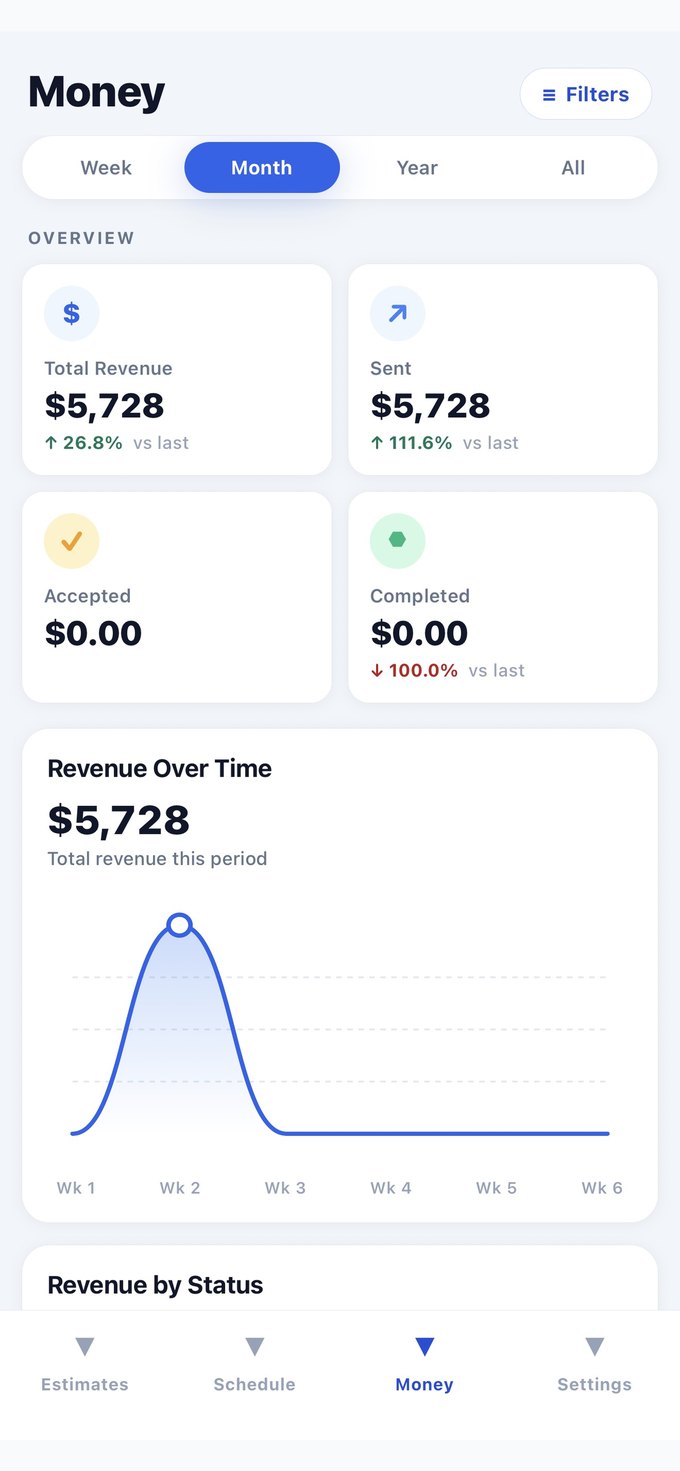
The Money tab answers the only question that matters at the end of the week: how much did we actually book?
- Switch the period — Week · Month · Year · All.
- Cards for Total Revenue, Sent, Accepted, Completed, each with the change against the previous period.
- Revenue Over Time chart and a breakdown by status underneath.
- Filters narrows everything down by date range, status or crew.
Common questions
Do I need signal on site?
Can I change prices for one job without breaking my defaults?
What if the same customer calls back next year?
How do second-floor runs get priced?
Can my installers see my margins?
Where do I change my logo and license number?
Something isn't working. Who do I ask?
That's the whole workflow.
Ten screens, four minutes, one signed estimate.